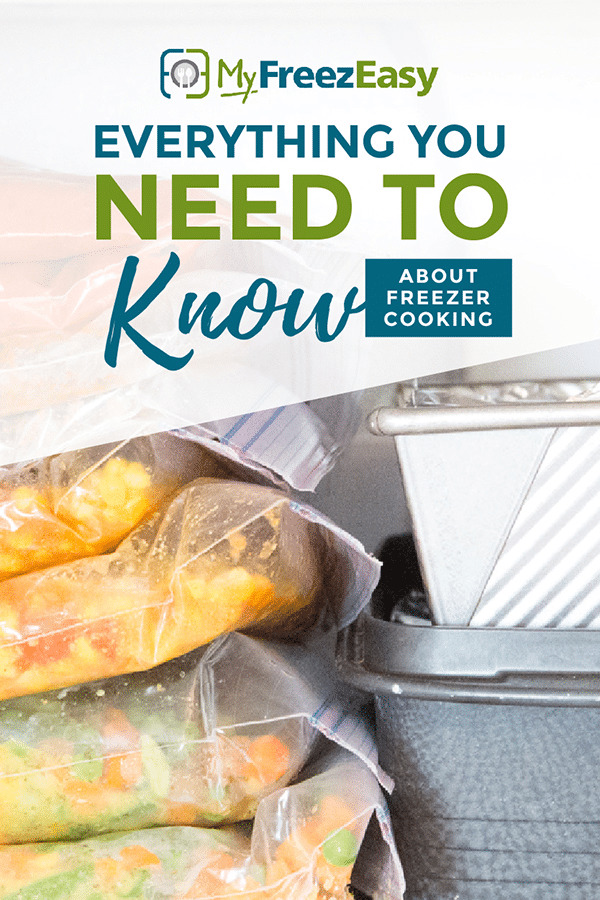
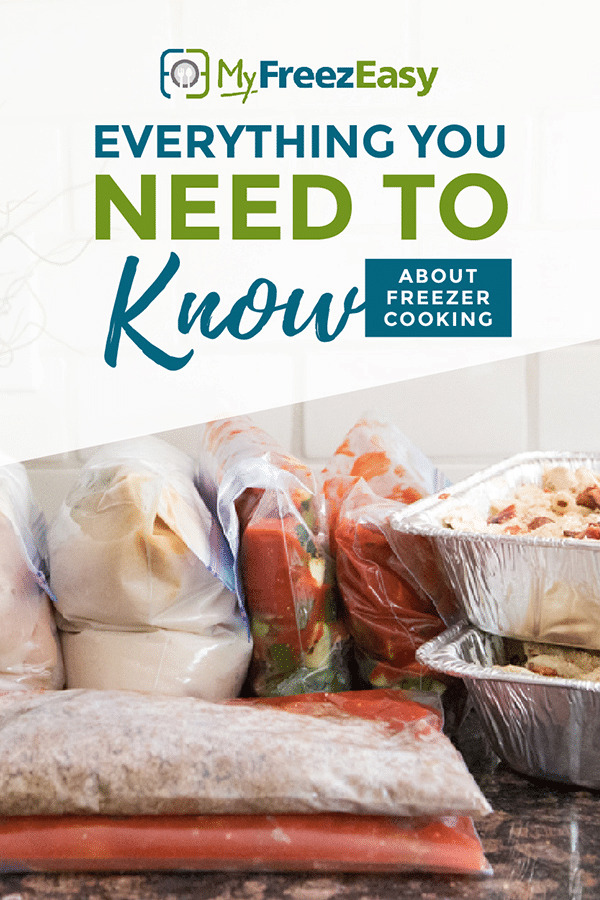
Learn how freezer meals fit into your life, how to make freezer meals without being in the kitchen all day, and how to freeze meats, meal starters, fruits and vegetables.
Why Freezer Cooking
It’s Thursday. And it’s going to be a great day.
I get the kids dropped off at school on time. With full lunch boxes and water bottles. And I manage to squeeze a few hours of work into the morning, complete with blog post writing, conference calls and new team member set up. I’ve enjoyed my salad for lunch and then the call comes in…”ELEMENTARY SCHOOL” flashes on my phone.
It’s never good when the school calls you.
It was the nurse.
Stitches are in order after a fall on the playground at recess.
I scoop up the baby, call my mom to see if she can pick up the preschooler, and make my way to the school to pick up the older 2 kids and head to the pediatric urgent care. It wasn’t a major cut, and I didn’t feel the need for a trip to the hospital emergency room. I figured I’d have a shorter wait (and drive) if we went to the nearby urgent care. Also, I had to figure in a trip to the drugstore for the gauze and bandages that we will need for the post-stitches care.
By my calculations, it would be dinner time by the time all this was said and done and I would be completely depleted of all energy from keeping the little folks busy and occupied for hours at the urgent care & drugstore. I wasn’t planning on this little afternoon adventure so I didn’t start the slow cooker earlier in the day.
Well…what to do?!
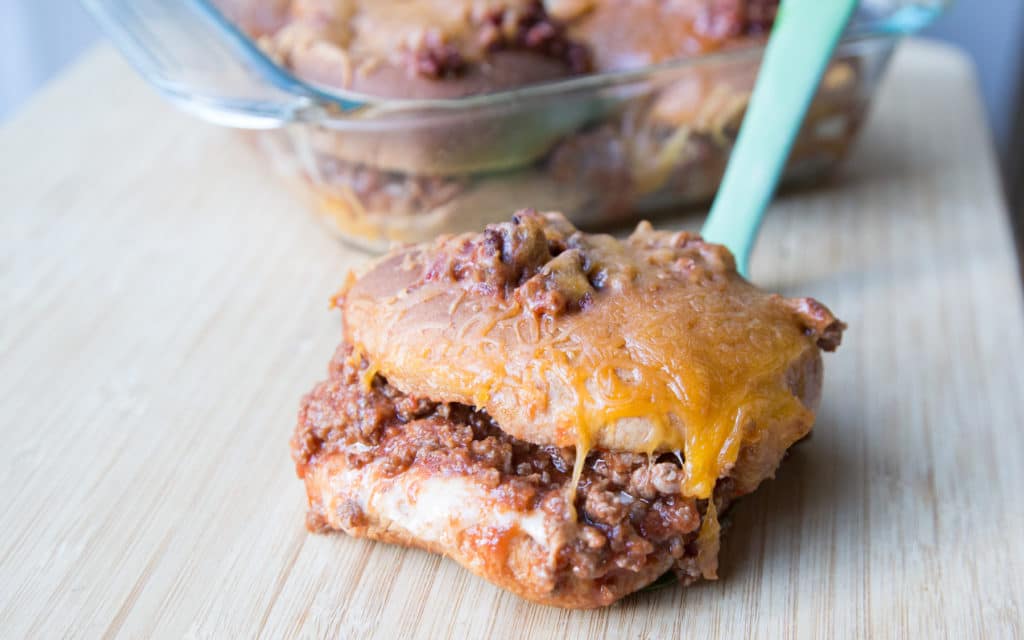
Rather than call for takeout and spend more $$ than I needed to for the day (urgent care co-pay plus drugstore stop = expensive!), I texted my husband and asked him to pull out some sloppy joe meat and slider buns from the freezer. I told him how to quickly thaw the cooked meat and sauce and reheat it, and when we arrived home the house smelled amazing with the sloppy joe meat gently bubbling on the stove top.
We avoided a $40 restaurant bill on a weeknight when we didn’t need to be spending money on take out.
Freezer Meals FTW (for the win)!
We all have those days. I have them more often than I prefer, but that’s life. It’s busy, it’s fast, it’s hectic, and sometimes it needs stitches. It helps having backup on these days. Specifically, food-in-the-freezer type backup. And this is what I love about freezer meals. They not only help on afternoons like the ones described above, they also help cut down on overall time spent in the kitchen, and save me just enough mental and emotional energy to get through the dreaded late afternoon witching hour when everyone needs my attention.
I’ve always said that being one step ahead of yourself when it comes to meals – both cooking and planning them – can do wonders on saving time, money and shreds of sanity.
In this ultimate freezer cooking guide, I’m going to share with you a few different concepts and ways that I make freezer meals work for our family. But before we get to the various freezer cooking methods, there are a few others items and housekeeping issues to discuss first.
What You Can Freeze
So what foods can you freeze? Most foods can be frozen. Complete meals can be frozen before they are cooked or after they are baked. Individual ingredients can be frozen. Just about anything can be frozen to use at a later date (except what’s listed in the next section.)
Here’s a short list that will make you hungry. Prepare to salivate…
- Spaghetti sauce
- Sloppy Joe sauce
- Taco meat
- Creamy Cajun sauce
- Hamburger patties
- Meatloaf & meatballs
- Stuffed Manicotti and pasta casseroles
- Enchiladas and burritos – both dinner and breakfast burritos
- Chili, soup and stew
- Marinated meat, chicken and fish
- Sliced meats for fajitas or stir-fries
- Shredded chicken or beef or pork, for tacos or sliders or sandwiches
- Breads: pizza dough, cookie dough, cinnamon rolls, biscuits, loaf breads, muffins, pancakes, and waffles
- Cooked beans (cheaper, healthier and just as easy as using canned beans)
- Cooked and mashed potatoes and sweet potatoes
- Fresh produce that you plan to use in smoothies or in baked goods or stews/soups
- Shredded cheese (Always stock up when you see great sale prices and stash in the freezer!)
What You Cannot Freeze
This is a very short list of what you cannot freeze. Here is what I don’t recommend freezing…
- Pasta or potato salads with mayonnaise, or anything with mayonnaise for that
matter. The mayo will separate as it thaws and…just gross. - Sliced cheese and blocks of cheese don’t do well in the freezer. The cheese loses
some of it’s grease/fat and sturdiness as it thaws and I prefer not to freeze it.
Shredded cheese is the exception which is why it’s in the “yes, freeze” list above. - Raw potatoes. So I do freeze some raw potatoes in slow cooker freezer packs, but
I’ve soaked them and they are generally coated in BBQ sauce or broth to keep them
from browning and oxidizing. To play it safe, you can leave the potatoes out of those
bags and add them to the meal when you go to prepare it. - Fresh produce that won’t be cooked or blended into a smoothie. Fresh produce will
lose it’s rigidity as the water content in the fruit will leak out as the fruit thaws. Most
fruits will mush-out after being frozen. I only freeze fresh produce that I plan to cook
or bake with, or puree in a smoothie. - Speaking of fresh produce, lettuce will turn soggy if you freeze it. The only greens
that I freeze are kale and spinach that I add to my smoothies.
The General “How To” Prepare Something for the Freezer
There is a distinct process for preparing meals or ingredients for the freezer and I find myself repeating this over and over and over in different recipes, blog posts and freezer meal plans. Here is the basic run-down for how to freeze things, whether raw or cooked:
1. Let the food cool down completely. Freezing completely cooled food will help reduce freezer burn!
2. Package up and remove as much as air possible if using a plastic baggie. If using a plastic container and freezing liquid, be sure to leave enough head space at the top, as the liquid will expand as it freezer. Add item to the freezer.
3. Keep in the fridge freezer for 3-6 months, or in the deep freezer for 6-12 months.
4. Thaw completely in the fridge overnight or for up to 2 days if it is ‘thick.’ (If you need the food that day, or within 30 minutes, you can let it soak in a warm bowl of water and it will quickly thaw. The thickness of the baggie or container will determine how long it will take to thaw. When I ‘quick-thaw’ things, it can take anywhere from 20 minutes to an hour.)
5. Reheat as directed in the recipe.
6. If baking a casserole from partially frozen, I recommend baking between 1 ½ and 2 times longer than recommended by the recipe, depending on how thawed the food is before you bake it.
Note: If utilizing the quick thaw method, please don’t leave raw meat out on the counter in a bowl of warm water. Always let raw meat thaw in the refrigerator to keep it at proper cold temperatures. If using a cooked sauce, let it thaw partially or completely before reheating.
Recommended Packaging
When it comes to packaging for freezer meals, I recommend the following products.
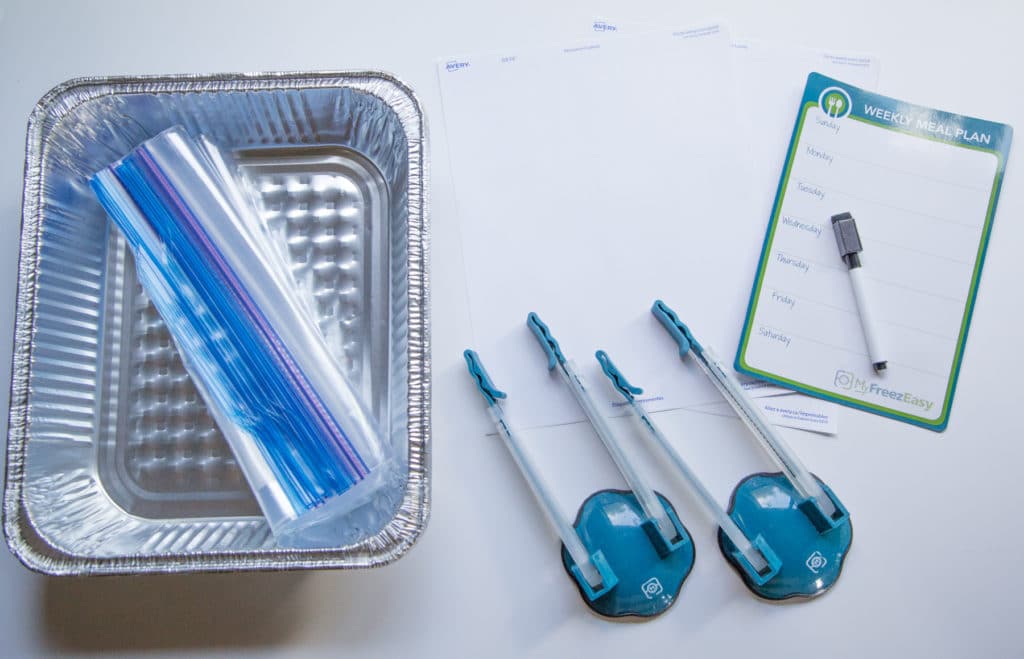
Gallon size plastic freezer baggies
These are what I use most commonly in my freezer cooking. I find myself using them for parts of meals or certain sauces or foods like mashed potatoes. They are great for cooked meats and sauces like spaghetti sauce, sloppy joe meat, taco meat, shredded beef, chicken and pork. Freezer bags are perfect for marinating chicken, beef or pork.
It’s easy to load them with slices of loaf bread or muffins and sometimes waffles or pancakes. I will add meatballs or meatloaf that’s wrapped in foil into a baggie to add an extra layer from the cold air to help reduce freezer burn.
I do reuse the baggies that did NOT contain any raw meat. I have a ‘muffins bag’ that I wash and reuse regularly. I also will wash and reuse spaghetti sauce bags one or two times before starting a fresh new baggie. Just don’t reuse bags that you marinated or stored raw meat in.
Plastic storage containers
I prefer plastic storage containers like Rubbermaid or Tupperware when freezing larger batches of soup or chili.
These ‘heavier’ and larger batches can be weighty enough to break a plastic baggie, so I use plastic containers for those items.
Disposable baking pans & foil
These disposable trays items are best to use for pasta casseroles, enchiladas, lasagna, etc. They can be reused if you wash them gently by hand with soap and warm water. I like to use these because I don’t have enough glass or metal casserole dishes to leave any in the freezer for an extended period of time.
When covering these disposable trays, I recommend using the ‘heavy duty’ foil that is slightly thicker or the non-stick foil to keep the cheese or top of the casserole from sticking to the foil.
Vacuum Sealing
“Do I need a vacuum sealer for my freezer meals?” is a common question that I hear from aspiring freezer cooking chefs. My answer is another question, “How long do you plan on leaving the food in your freezer?” If you plan to leave your food in the freezer for longer than 2 months, then I would recommend a vacuum sealer.
Around our house, food doesn’t generally stay in the freezer that long, so I don’t end up vacuum sealing that often. Entirely up to you whether or not to invest in one!
Freezer Meal Space, Inventory & Food Rotation
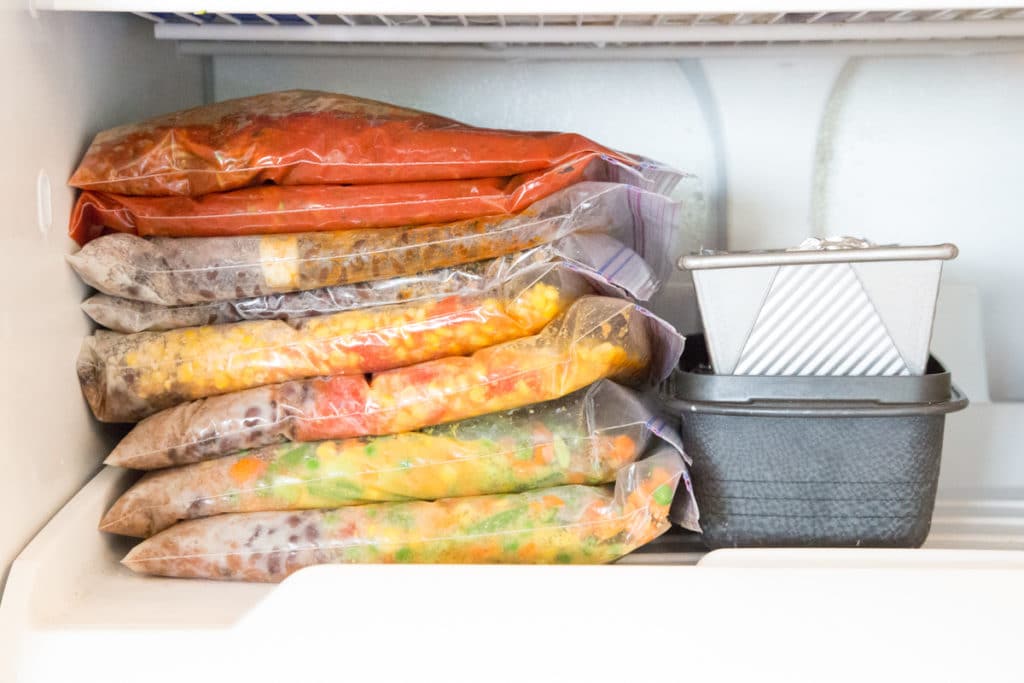
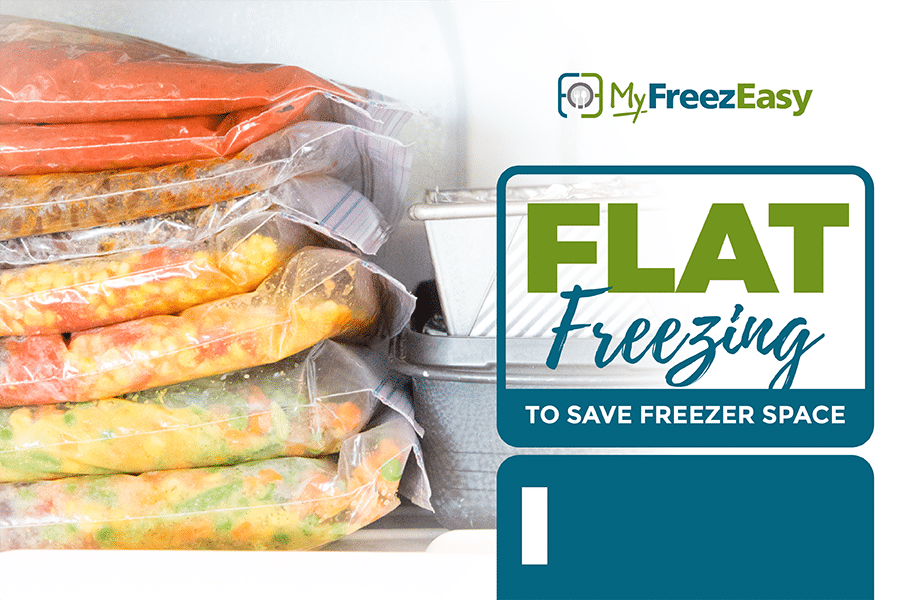
To save space, I recommend ‘flat freezing’ in baggies and disposable pans. When making things like spaghetti sauce and chili or soup or anything that is fluid/liquid, add it to a plastic freezer baggie and let it fill up the baggie so you can lay it flat. Remove as much air from the baggie as you can (using a vacuum sealer, or even a straw!) and seal it tight and flat.
Freezing things flat in the freezer will help save space and make it easier for you to get them out of the freezer. It will also help reduce the thawing time. Baggies that have been flat frozen do not take nearly as long to thaw, especially if you place them a in bowl or shallow dish filled with warm water. In just a matter of minutes, your sauce will be thaw.
Note: If utilizing the quick thaw method, please don’t leave raw meat out on the counter in a bowl of warm water. Always let raw meat thaw in the refrigerator to keep it at proper cold temperatures. If using a cooked sauce, let it thaw partially or completely before reheating.
Printable Freezer Inventory List
In our free workshop, you’ll find a printable freezer inventory list that you can print out and post on your freezer to help keep track of what’s inside. This will assist you in rotating through your foods quickly, so nothing gets left in the bottom of the freezer for years.
You can tap here to sign up for the free workshop!
Erin’s Freezer Meal Stash
I wanted to share a handful of items that I almost always have in my freezer at any given time. As soon as the inventory for these things starts to run low, I adjust my meal plan to either do a ‘full cook/prep’ or ‘batch cook’ a few meals in a week to replenish the supply in the freezer. (More on the different methods in the next section.)
- Cooked and shredded chicken.
- Homemade chicken stock. (Made when I cooked the whole chicken for the shredded chicken.)
- Spaghetti sauce
- Sloppy Joe sauce
- Meatballs and/or meatloaf
- Variety of frozen veggies (generally the larger bags from Costco)
- Bread of some kind
- French fries or tater tots
- Homemade muffins or loaf bread
- Homemade pancakes or waffles
- Breakfast burritos for my husband’s morning commute
- Casseroles or enchiladas
Having a steady supply of these items and parts of meals in the freezer regularly keeps me out of the drive-thru lane or from grabbing take out.
Spending just a few minutes extra a week to get meals into the freezer can save me hundreds of dollars a month on restaurant bills!
Freezer Cooking Methods & Strategies to Save Money and Time
A number of different concepts and methods for making freezer meals exist and I thought it prudent to take a moment to discuss each one.
- Bulk or Batch Cooking – Bulk or batch cooking is doubling or tripling favorite recipes and freezing what you don’t eat that meal. These are easy to incorporate into your weekly meal plan, as you’re already in the kitchen working on the meal so why not double it up.
- Weekly Freezer Cooking Sessions – Once a week, you can prepare 5-6 freezer meals for dinner and another meal or two for breakfast or lunch. These cooking sessions can take between 2-3 hours to complete, depending on what you are cooking.
- Monthly Freezer Cooking Sessions – These power-cooking sessions can produce 20-40 freezer meals in 4-8 hours time. Cooking meals for a month can come in handy for everyday living, or for when life throws you curve balls or babies! After surgery or having a baby, having food stashed in the freezer is crucial…both for time and sanity saving reasons.
- 1 Hour Power Freezer Cooking Sessions – If you want a little more focused cooking session, then plan an hour to get 4-5 meals or prepared ingredients into the freezer. Brown some ground beef, mix up some meatballs, bake some muffins and cook a double batch of pancakes to freeze as well. Set the timer and get to work!
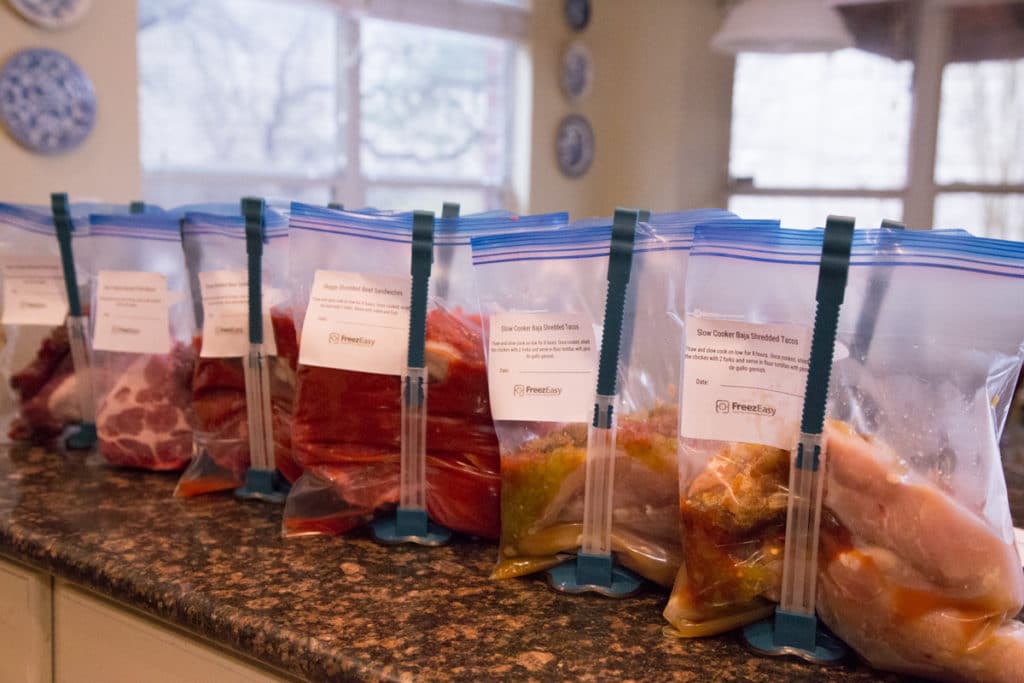
- Slow Cooker Freezer Packs – These slow cooker meals are ‘dump and run’ packs that you prepare ahead of time and in batches to keep in the freezer. They can be thawed and then cooked all together in the slow cooker. I use gallon size freezer baggies and load them up with everything you need for that meal and then freeze. I let them thaw partially or completely before adding them to the slow cooker and cooking as directed. These are a great way quickly prepare your favorite slow cooker, freezer friendly meals.
Money Saving Freezer Strategies
I would challenge you to utilize the freezer as a money saving tactic. As you watch the sales and prices at the grocery store, please start stocking up on the meats and veggies when you see them on sale. When you see boneless skinless chicken breast on sale for $1.99/lb., I beg of you to please buy enough packages to last until the next sale (usually 6-8 weeks later!) While every grocery store’s sales cycle differ slightly, if you watch your stores closely, you’ll start to notice a pattern of when they offer best prices on meats.
As you slowly begin to fill your freezer with meats and veggies, you’ll discover a shift in the way that you grocery shop and plan your meals. Instead of planning then shopping, you’ll find yourself shopping, filling your pantry and freezer, and THEN planning your meals based on what you purchased at rock bottom prices and what you have in your house!
While both options, meal planning then shopping & shopping then meal planning, are great money saving strategies, I have found that shopping the sales and stocking up, then planning around what you have on hand is the best way to save more money in the long run. Here’s a peek of what that looks like…
Week 1 – chuck roasts and split chicken breasts are on sale. Organic baby carrots are on sale, as are yellow onions and sweet potatoes.
Shopping Plan: Purchase 3-4 roasts, 3-4 packages of split chicken breasts, 3-4 bags of baby carrots, an extra bag of yellow onions, and triple the amount of sweet potatoes you would normally purchase.
Freeze Plan: Marinate the beef roasts & chicken pieces, or just freeze them and marinate later. Freeze the baby carrots to use in soups or stews. Chop up or slice and freeze the extra bag of onions to use in soups, stews, sauces and fajitas. Make a triple batch of mashed sweet potatoes and freeze what you don’t eat for dinner that night.
Week 2 – Pork chops are on sale, as are celery and the last of the strawberries for the season.
Shopping Plan: Purchase 3-4 packs of pork chops, and extra stalk of celery, and as many strawberries as you can fit into your budget.
Freeze Plan: Marinate the pork chops, or just freeze them and marinate later. Chop up the celery and freeze in 2 cup portions to use for soups, stews and casseroles. Remove the stems from the strawberries and flash freeze (details in Freezing Tutorials section) to use in smoothies later.
Week 3…it goes on and on.
After a few weeks, you’ll have all kinds of food in your freezer and pantry to start making up meals. Eventually your shopping list will be just fresh produce, dairy and bread. Then, you’ll need to purchase more meat when it goes on sale again and keep the rotation going. Just remember to keep enough on hand for what your family needs.
Over time, you’ll fall into a nice rhythm and will enjoy all kinds of savings, too! (Tap below if you really need help with your grocery spending!)
Time Saving Freezing Strategies
Smoothie Packs
Set aside a few minutes on the weekend or when you have the energy on a weekday evening and package up what you would normally add to the blender in a quart size freezer baggie. Pour some milk or yogurt into an ice cube tray, then freeze.
To each make ahead smoothie baggie, add a few cubes of frozen milk or yogurt in with your favorite fruits and freeze it all up! When you’re ready to make your smoothie, just dump it all in, add a little water or juice so it will blend well and puree away! You’ll find some great smoothie recipes at the end of the recipe section of the guide. Use those or your favorite smoothie combinations to make 10-20 packages of Make Ahead Smoothie Mixes at a time.
This is a great way to take advantage of sales on produce. You can buy a few extra pineapples when they go on sale for 98¢. Cut them all up and freeze with some bananas and apples or bananas and oranges and there’ll be cheap smoothies ahead for you!
Baking Mixes
If you ever purchase larger amounts of flour, sugar and other baking ingredients from a warehouse store, then it helps to set aside some time to make some baggies with the mixes pre-measured out. Then you just dump and add the egg, oil, milk and other liquid ingredients for baked goods like pancakes, waffles, muffins, etc. While it takes a few minutes to measure everything out, it sure makes a huge difference on those busy afternoons to have everything pre-mixed and ready to dump.
Because when you have little ones under foot or work full time or are going through a tough time in life, every minute in the kitchen counts!
These baking mixes can be stored in the pantry if they are sealed well, but when I make a huge batch of them I prefer to store them in the freezer. I roll up the labeled bags and place them in a plastic container that fits in my deep freezer with the label facing up. Then I can quickly grab what I need and get to making it.
I don’t usually worry about the flour being cold when I prepare foods, as it warms up quickly in the stand mixer when I’m making the batter. You can always pull it out early to let it warm up to room temperature, but if you forget it’s okay. (I forget all the time!)
Freezer Cooking Tutorials
In this next section, I will show you how to prepare individual items or ingredients for the freezer.
Fruits & Vegetables
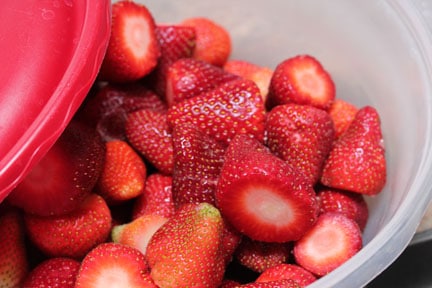
How to Freeze Strawberries
- Wash and pat dry strawberries.
- To flash freeze whole strawberries for smoothies, cut off the stem.
- Lay on their sides on a rimmed baking sheet.
- Place in the freezer for 20 minutes or so.
- Remove from the freezer and scoop off the sheet. Use a spatula if any are stubborn and had the chance to freeze to the sheet.
- Place in a plastic storage container or plastic freezer baggies.
- To freeze cut strawberries for muffins, breads, and pancakes, cut them into bite size pieces and place them in a plastic freezer baggie and press them flat.
- Seal and remove as much air as you can.
Note: Once the strawberries are frozen, they will not have their same shape or texture. That’s why they should be used in smoothies or for baking.
How to Freeze Blueberries
- Rinse your blueberries and dry them with paper towels gently.
- Lay them out in baking dishes and place them in the freezer to flash freeze them.
- Once frozen, transfer the blueberries into quart size freezer baggies. Use them for smoothies, pancakes or muffins.
How to Freeze Raspberries
- Rinse the raspberries and drain them for a few minutes in a strainer.
- Place them on a paper towel to remove excess water.
- Arrange in a single layer on a baking sheet.
- Freeze for a few hours to flash freeze, and then transfer frozen raspberries into freezer bags.
How to Freeze Butternut Squash
- Butternut Squash can be frozen “raw.”
- Peel, dice and then freeze.
- Dice into larger chunks and smaller pieces and place in separate bags for the freezer.
- Add the smaller frozen pieces to risotto, rice pilaf, brown rice, orzo, or quinoa.
- Roast the larger frozen, raw butternut squash pieces as a delicious and healthy side dish. Or use the larger frozen chunks in soups, stews or slow cooker recipes.
How to Freeze Ears of Corn
- Shuck the corn.
- Wrap each ear in plastic wrap.
- Wrap them all up in foil and/or drop into a freezer plastic bag.
- When ready to use, unwrap and drop them frozen in boiling water for 4-5 minutes or until ready.
- Alternate method: blanch corn for 4-6 minutes in boiling water, submerge in an ice bath for 4-6 minutes, dry off and then freeze using the method above.
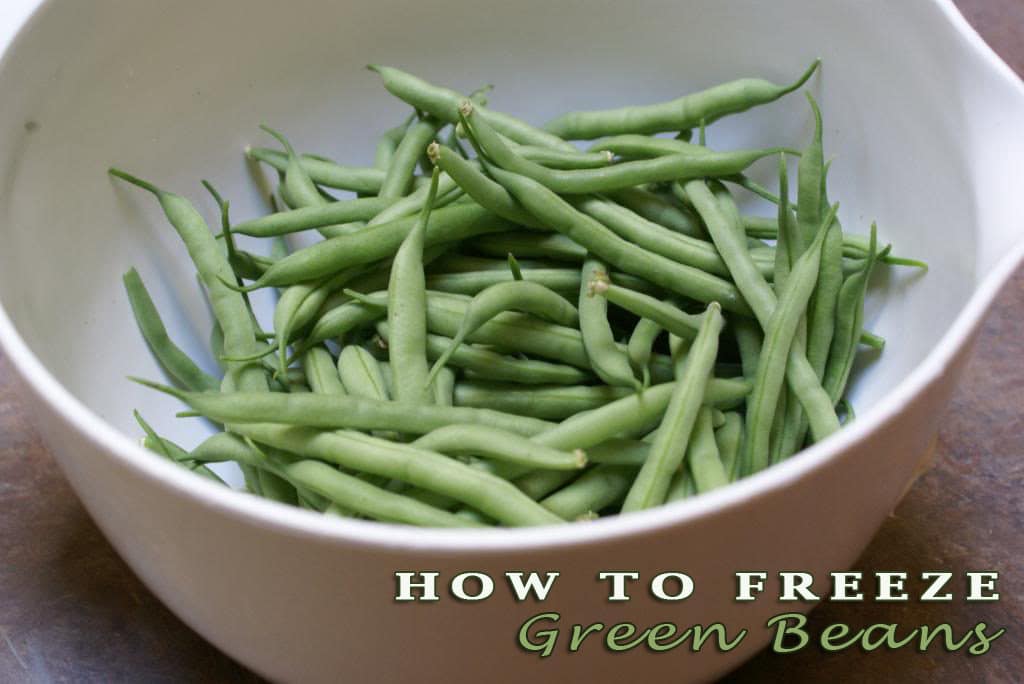
How to Freeze Green Beans
- Fresh green beans should be blanched before frozen.
- Rinse and remove stem tips
- Boil green beans for 2-3 minutes.
- Immediately transfer the green beans to a bowl filled with water and ice cubes. Let sit for 5-10 minutes. Drain and pat dry.
- Freeze in freezer baggies or plastic container.
How to Freeze Zucchini
You can shred zucchini for recipes like zucchini bread. Dice for recipes like chunky zucchini muffins and chunk or slice zucchini to freeze and drop into smoothies. Slice, dice, or shred zucchini for future recipes and place in a freezer bag or container and freeze until ready to use!
How to Blanche and Freeze Broccoli
Broccoli freezes really well only if you blanch it first! Blanching keeps the color crisp and green while preventing the broccoli from getting mushy after thawing. Here’s how:
- Fill a pot with water, add salt, and bring to a rolling boil.
- Wash and snip broccoli into pieces. You want the pieces to be uniform in size as much as possible.
- Fill a separate bowl with water and ice cubes.
- Add the broccoli to the boiling water in small batches. Cook for 2-3 minutes until heated by not mushy.
- Remove the broccoli from the water and place in the bowl of ice water.
- Leave in the ice water for a few minutes until no longer warm. Drain thoroughly.
- Repeat with remaining broccoli as needed.
- Air dry or pat down broccoli with paper towels before placing in freezer bags or containers. Freeze.
How to Freeze Peppers & Onions
Spot a hot sale on bell peppers?! Grab extras and freeze with onions for your next fajita meal!
- Seed and slice 2 bell peppers, 1 hot pepper (such as serrano, poblano or jalapeno) and slice 1 onion.
- Add the 3 peppers and onion slices into a plastic baggie and label “for Fajitas”.
- Let thaw completely and pat dry before sautéing or grilling. Season with a little salt and pepper and taco or fajita seasoning as they are cooking.
How to Freeze the ‘Cajun Trinity’ Vegetables
Whenever I see onions or celery on sale around the holidays, I like to grab a few extra stalks or bags to chop up for the freezer.
- Chop onions, peppers and celery into 1/4” or smaller pieces.
- Mix equal amounts of each together and place into a plastic freezer baggie or small plastic container.
- Use in your favorite soup or stew that calls for the Cajun veggie trifecta.
- I recommend freezing in 2-3 cup portions, as that amount will work for most recipes.
How to Freeze Hatch Chiles
- Dice the peppers and freeze them in ½ cup portions in a small plastic container or freezer baggies. This will give you just the amount you need for recipes that call for 4 oz. canned green chile peppers.
- Make sure to label the freezer bag and date it. The chilies will be good in the freezer for up to 12 months.
How to Freeze Carrot Juice for Smoothies
- Juice fresh carrots.
- Pour into ice cube trays. Freeze completely and then break the cubes out and store them in a plastic freezer bag.
- Use 2-3 cubes in your smoothies.
How to Freeze Fresh Herbs
- Soak your fresh herbs in water.
- Rinse thoroughly.
- Puree with some water or oil like olive oil. Any combination of herbs will do.
- Freeze in ice cube trays.
- Once frozen, pop out of the trays and store in a freezer baggie or container.
- Enjoy in your favorite pasta sauces, soups and stews!
- And don’t forget…you can always use a combination of Italian type herbs to make a great pesto and freeze that too!
How to Freeze Homemade Freezer Jam
Ladle the homemade jam into freezer containers and place in the refrigerator overnight to let it cool slowly and set. Then store in the freezer. Good in the freezer for up to 1 year, in the fridge for 3 weeks.
Cookies & Breads
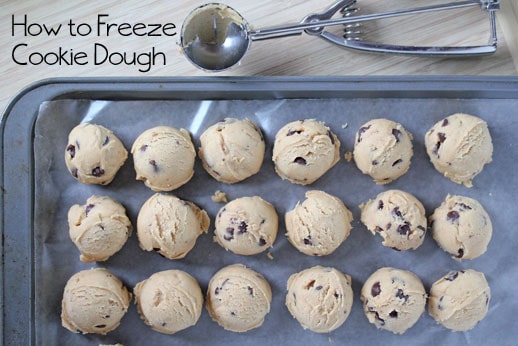
How to Freeze Cookie Dough
Freezing Cookie Dough Balls
- Simply scoop out dough and roll into a small dough ball and place onto a piece of wax paper on a baking sheet.
- Flash freeze for 20-30 minutes, then transfer dough balls to plastic freezer baggie. You could also lay the balls flat in a plastic freezer baggie and freeze them in a “tray form.”
- Freeze, up to 3 months.
To cook, pull out the ones you will cook and place them on the baking sheet and let them warm up some while the oven preheats. I’ve found that if they just get a few minutes out of the freezer to warm up to room temp, the baking time does not need to be modified from the original recipe. If you are taking them straight from the freezer to a hot oven, I’d add no more than 2 minutes of cooking time…watch them closely to not over bake!
Freezing Cookie Dough Rolls
If you want to make cookies using the “slice and bake” method, then I recommend freezing the dough in a log shape.
- Lay out a piece of aluminum foil and then a sheet of plastic wrap over the foil.
- Drop the dough onto the plastic wrap and shape into a circular log, much like the “rolls” that you purchase at the grocery store. Press until it’s uniform in shape.
- Wrap the plastic wrap around it and twist off the ends. Then wrap the foil around the plastic wrap.
- Freeze, up to 3 months.
- To bake, slice and bake as directed in the recipe. Thicker slices may require an additional 1 to 1 1/2 minutes of cooking if the slice is mostly frozen.
Freezer Meals: How to Freeze Breakfast Breads
Muffins
Once your muffins have baked, let them cool completely before adding them to a plastic baggie or container. Fill up the baggie or container and freeze the muffins. Muffins will thaw in a few minutes on the counter top, or you can run them through a defrost time in the microwave. You can also add them to lunchboxes frozen and they will be perfect temperature at lunchtime.
Pancakes
Oh pancakes…we love pancakes! But they can take awhile to pull together and cook several batches worth. We generally have them for breakfast on the weekends, or sometimes for ‘brinner’ during the week. As our family has grown, I’ve learned that it’s imperative to make at least a double batch while I have the griddle out on the counter.
Because there’s always a child who requests them in his lunchbox, or a little dude who asks for them for lunch at home. Or I get a craving for them, so… It helps keeping the extra batch handy in the freezer, as I always feel like I’m pulling them out for a meal or snack.
Here’s my trick for you: save your bread bags. The right size pancakes will fit perfectly stacked in a bread bag. Let your cooked pancakes cool down on a cooling rack, but don’t leave them out too long so they don’t dry out a little. Once they are cooled, stack them up and slip them into a bread bag and freeze.
When you’re ready to eat them, take out how many you need and thaw and reheat them in the toaster. Here’s what I do with my toaster: drop them in and heat on ‘level 1’ to help them thaw. Then heat on ‘level 2 or 3’ so they warm through completely and are perfect and ready to be slathered in butter and syrup. Every toaster will be different, but I’ve found a minute on level 1, followed by a longer toaster cycle will get them perfectly warm and ready to eat.
Waffles
Same story as pancakes, right? So delicious and worth making, but those waffle makers can take awhile to make each batch. Truth be told, when we have waffles for a meal, I generally end up standing and eating them while I tend to the other batches that are being cooked. I don’t mind because I can enjoy another plateful later that week.
I also recommend freezing your cooled waffles in a bread bag. You can also use a plastic freezer baggie for them, but I think they are easier to get in and out of the bread bag!
Cinnamon Rolls
Cinnamon rolls are another fantastic treat that takes a little time and patience in the kitchen when making from scratch. Sometimes I wish I had 10 bread machines, so that I could make 10 batches at once. (I’m a lazy bread maker and rely too much on my bread machine…or stand mixer to prepare and knead the dough. I’ll blame the arthritis in my hands, really!) Anyways, cinnamon rolls can be easily frozen and I recommend freezing the dough before you bake them.
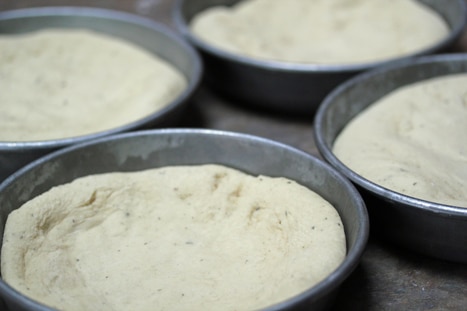
Prepare the dough as directed, then assemble and roll up as directed and place into the pans (or disposable trays) as directed. After the second rise of the dough, cover the pans with foil and freeze. When you’re ready to bake them, let them thaw partially or completely before baking. You might need to add a little extra baking time, depending on how thawed out they are when you put them in the oven.
If you need to add more than 20 minutes to their bake time, I recommend covering loosely with foil while they are baking to keep them from browning on top. You can also freeze cooked and frosted cinnamon rolls after they have cooled down. Microwave frozen cooked cinnamon rolls when ready to eat.
Freezing Pizza Dough
Freezing pizza dough works best between the first and second rise. So if you are making the dough in your bread machine, that’s really the first rise. Roll out the dough on a lightly floured surface. Add a little cornmeal to the flour if you want to give it that extra pizza flavor. Once rolled, form it into the shape that you want it.
If freezing into a large rectangle or circle shaped baking sheet, then be sure that you have a freezer baggie that is large enough to hold it. If you don’t, you could wrap it tightly with plastic wrap and/or foil once it has frozen. And if you are making the dough by hand, then place it on to the cookie sheet after rolling it out after the first rise. Place the dough in the freezer for at least 2 hours. Once frozen, transfer to a plastic freezer baggie.
Can you freeze the dough that has already been baked?! Absolutely! Bake the crust for 6-10 minutes, depending on the thickness and then set out to cool on a cooling rack.
Once completely cool, add it to a large plastic freezer baggie, or wrap with plastic wrap and/or foil.
Freezing Yeast
When you make your own bread and dough for pizza and cinnamon rolls, you go through quite a bit of yeast. It’s cheaper to purchase a jar of yeast versus those 3-pack strips, but you don’t want it to go bad before you use up the jar. I recommend storing the jar of yeast in the freezer to keep it active longer. There’s nothing worse than going to proof yeast to make bread and it’s not active anymore! (Ask me how I know!) Store your yeast in the freezer to help it keep longer!
Freezer Meals: Meats & Casseroles
Freezing Meatloaf
- Simply line the pan with foil and then add your meatloaf.
- Fold the foil around the meatloaf.
- And pop it into the freezer!
After the meatloaf has frozen, take it out of the pan and place the foil wrapped meatloaf into a plastic freezer bag. (I prefer to double wrap with both foil and plastic bag to help with freezer burn.) When you are ready to cook it, simply place the foil back into the pan that you used to freeze it and then bake. If you want to thaw it first, place it into the fridge to thaw, at least 1 day ahead of time.
To bake from frozen, add 1.5 to 2 times longer than the time suggested in the recipe. I have found that my meatloaves take about 1 hour, 45 minutes to cook from frozen (from a regular baking time of 1 hour).
Freezing Meatballs
I often find myself purchasing 5-6 lbs. of ground beef at once and I’ll usually make a few batches of meatballs from the big pack. I prefer to freezer my meatballs raw and cook them with the sauce later, but you can also freeze them after they have been cooked through.
- Line a baking sheet with foil.
- Make the meatballs as directed in the recipe.
- Form into 1” balls and place on the baking sheet.
- Flash freeze for about an hour in the freezer.
- Take the partially frozen meatballs and add them to a plastic container or freezer baggie, in meal size portions.
- Flash freezing them will help them from sticking together in the baggie or container.
You can also freeze them in a pan to bake them together in the pan.
- Line a 9×9 or 7×11 inch baking dish with foil.
- Add the meatballs to the dish. I can usually fit 12 meatballs in a baking dish
- of this size.
- Pour any sauce over the meatballs, if directed.
- Wrap the foil around the meatballs and then slide the foil packet into a plastic freezer baggie.
- Let thaw before adding the meatballs back into the same baking dish.
- Bake as directed.
Cooked Meats
Need dinner on the table in a matter of minutes? It’s totally possible if you have precooked meats in the freezer. As you’ve already read, I like to have a good stock of cooked meats on hand to keep myself out of the drive through lane.
My favorite cooked meats or “meal starters” to have on hand are:
- Taco meat
- Spaghetti sauce & Sloppy Joe sauce
- Cooked, shredded chicken – plain or mixed with BBQ or marinara sauce
- Raw Meats
Sometimes I don’t have time to prepare meats for the freezer when I get home from the grocery store. I try to build in enough time in my schedule to prepare things for the freezer right when I get home, but it often happens when I’m cooking that afternoon…or not at all. When I don’t have time to prepare meats for the freezer, I’ll either drop the package as I purchased it into the freezer. The other thing that I recommend doing if you have just 5 minutes is to mix up a marinade for the meat and add the marinade to a baggie with the raw meat and freeze the meat in the marinade.
The meat will marinate as it thaws in the fridge, and will be perfectly delicious once cooked.
Freezing Casseroles
Casseroles have a great reputation for being freezer friendly! They do really well in the freeze-thaw-reheat process and I highly recommend keeping a few in the freezer for when you need a quick meal for yourself, or a meal to deliver to a friend or family member in need.
I love freezing trays of enchiladas, pasta casseroles, as well as rice and veggie casseroles too. Freezing them in a disposable tray is especially helpful, so that you don’t end up with a freezer full of Pyrex baking dishes and nothing left to cook with! I keep an eye out for the sales and specials for disposable trays and stock up when they are discounted. You can also find them at the dollar stores!
Put an end to dinnertime stress with MyFreezEasy
It’s more than freezer meal plans…
You choose the recipes your family likes, then MyFreezEasy pulls them together and gives you a customized meal plan with:
- complete recipes plus doubled version to freeze so you can easily prepare and cook your meals
- shopping lists so you can get in and out of the store
- streamlined assembly instructions so you can spend as little time as possible on the freezer meal prep
- downloadable labels with directions for cooking so you know what to do when its time to cook/reheat the meal!
You can create your customized meal plan from your computer, or even from your phone while you are at the grocery store!
Click here for more information about becoming a MyFreezEasy member!
New to freezer cooking? I have the perfect workshop for you – just fill out the form below!
